Ten Minute Guide to Firefly Hull Repairs
Introduction
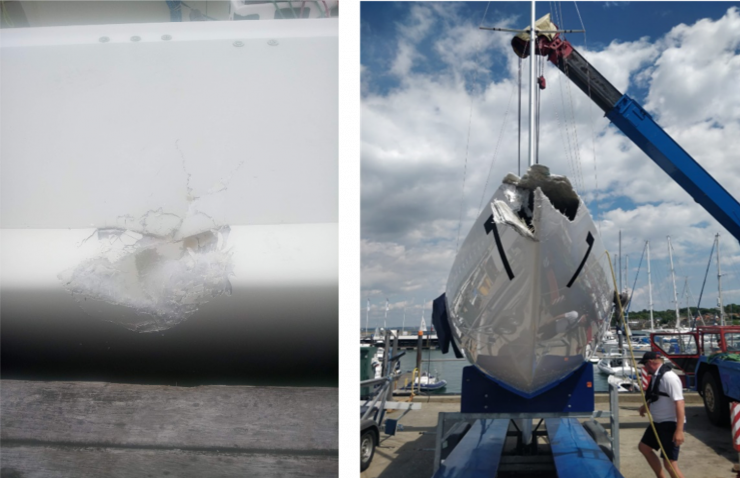
Glassfibre boats get damaged, it’s a well-known fact in university sailing. Whether it’s from a team racing manoeuvre gone wrong, an unfortunate collision from beginner training or general wear and tear in older boats, avoiding damage is a virtually impossible task. However, getting it repaired doesn’t always have to be an expensive job requiring a professional. Many hull repairs are easily to carried out for a lower cost. A large part of maintaining a boat is making sure it doesn’t get damaged in the first place. This is best done by regular monitoring of you boats, checking all the major failure points. This can be done through the use of maintenance schedules. An example of a maintenance schedule is shown here. This guide is important hopes to help after damage has happened.
Every repair requires a carefully thought out plan, and time. Most importantly, don’t be afraid to ask for help if you need it.
Step 1: Assessing the Damage
The first step is to assess the damage you have, thinking about these questions when you do it:
- Will it stop you sailing?
- For example, is water coming in or is the damage near a critical part of the boat?
- Can you do a ‘regatta repair’ to continue sailing, then improve it later?
- Maybe by putting some tape over it to stop the fibreglass getting wet or people injuring themselves from it.
- Do you have the facilities to repair it quickly
An easier issue to fix compared to a more severe fix needing time, planning and facilities to fix.
Step 2: Planning
You’ve decided to repair the damage. This is the time in which a little planning goes a long way. Before you start, ask yourself the following questions:
- How are you going to repair the damage?
- Is this something that only requires filler and gelcoat, or is it more structural and going to require glassfibre?
- Is a glassfibre repair large enough to require a layer of matting, or can you get away with building out the area with chopped strand?
- Do you have the equipment and PPE to do this repair, or will you need to order things?
- Some damage is better not to start until you have all the stuff, whereas some can be started with the kit you have and finished off later. For example, if you don’t have enough resin then you really should buy some more before you begin, but if you don’t have enough gelcoat and the repair requires re-glassing first then you can probably make a start.
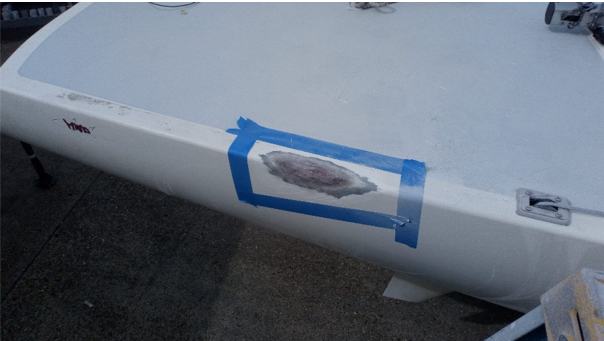
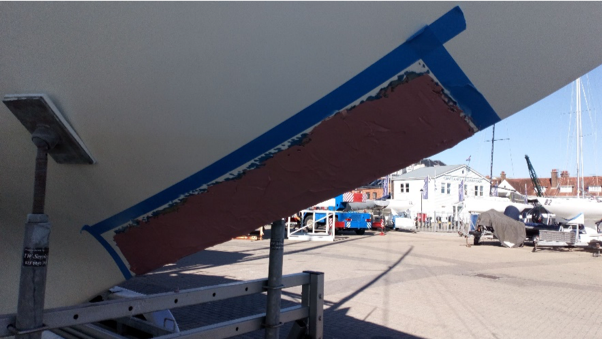
Step 3: Preparing the Area
The first work you need to do is to grind out the area that is damaged.
Safety: sanding or grinding should be done wearing appropriate safety goggles and dust mask.
- This could be done by hand using sandpaper (the lower the number, the more coarse the sandpaper so the faster this will happen. If you do shave away a bit too much you can always build the gelcoat back up later).
- If you have the necessary PPE and training, then an angle grinder with a high grit (at least 120 grit) sanding disk will speed the process up significantly.
- Make sure you know how to use these before you start on a boat. Without proper training you can damage the boat, or worse seriously injure yourself.
Taper (gradually slope) out your grinding around 100mm away from the damage. The area around the damage should be smoothed out to a gentle depression.
- Measuring around the damage will give you a guide as to how far out you need to sand.
Clean away the dust and dirt from the area and make sure the surface is dry. Acetone is often used to clean these areas, use a little on a paper towel in a well ventilated area and avoid getting any on your hands.
Step 4: Taping
Tape a section around the damage. This will help protect the rest of the boat and give you a clear area to work in. Masking tape is your best bet, duct tape of insulating tape often leave sticky residue after you remove it in later steps.
Step 5: Build out the Area
There are a number options for glassfibre repairs as there are several different types of matting and two different types of resin.
Resin types:
Polyester resin: Cheaper and what your boat is probably currently made out of (only very high performance boats tend to use epoxy as a resin system).
Epoxy resin: More expensive, stronger, harder and lighter. If you want a high quality repair this might be a better choice.
Glassfibre types:
Chopped strand: Short strands of glassfibre, which form a loose powder. These can be mixed with your resin to the desired consistency and provide structural repairs to small areas.
Chopped strand mat: a sheet of glassfibre which can be purchased in varying thicknesses. The thicker the sheet, the stronger the repair. Fibres are onmi-directional to it provides some structural support in all directions, but not as much as biaxial mat. Often best to use several layers of this mat, rather than one thicker piece.
Biaxial mat: This has glassfibre strands laid in two directions at 90 degrees to each other. This makes it thicker and more structurally solid than either of the other forms of glassfibre, so better to repair areas which need more structural support, such as bows for example.
There are also glassfibre tapes and structural supports available depending upon your supplier, so it is worth having a conversation with them about more complex repairs, if you are doing it yourself.
Start by making up your glassfibre and resin mix to build up the area with chopped strand.
Safety: wear gloves and a dust/fume mask while you work with glassfibre.
- The manufacturers instructions should tell you what ratio of fibres: resin to use. Mix to the desired consistency and stir well.
- Less fibres will make the mixture runny. More fibres can be added while stirring to make it thicker.
When sufficiently mixed, layer the mixture over the repair. Press the mixture generously over the repair and leave to dry.
- This will take several hours, depending on heat and humidity. Working in a warm, dry area will speed this process up drastically.
Once dried, flatten back the area using your sandpaper or angle grinder.
- For more severe damage, this is where you need to lay some more structural glassfibre. Damage that doesn’t require structural reinforcement, move onto step 6.
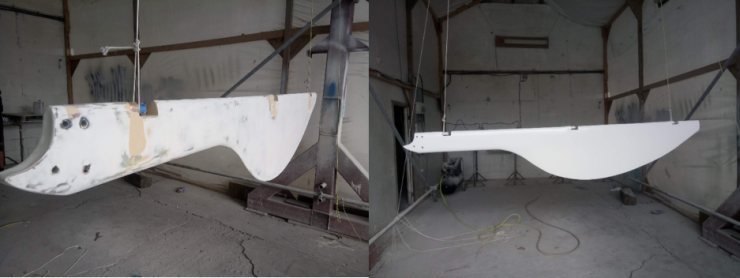
More severe or larger damage will now require glass matting as reinforcement.
- Cut the section of matting to size before you start and use a paintbrush or roller to apply the resin to get a more even coating of resin.
Step 6: Fairing the Area
Once your final layer of glass has finished drying, it’s time to sand the area again.
- Make sure there are no jagged edges or spots higher than the rest of the hull.
Now you need to build the repair out to the same level as the hull using filler. Make up according to the manufacturers instructions and apply smoothly to the area.
- There are a number of marine filler products available, but car body filler is also a suitable alternative (just check it does not absorb water by searching for the brand name prior to application).
Fairing is a time-consuming process. Once dried, sand again and add more filler as necessary to match the shape of the repair to the surrounding area.
Step 7: Colouring the area
Once the area is fully faired, there are a couple of ways to get the repair back to the original colour.
- Gel coat. The manufacturers instructions should tell you what ratio of filler: resin to use. Mix to the desired consistency and stir well.
- For a smooth finish you can again use a paintbrush or roller to apply the gelcoat. Just not the same one that you used for the resin mix.
- If you can get gel coat from the boat builder, then this process will be a lot easier
- Otherwise, you can buy pigments online and accept that the repair will probably be slightly off-colour compared to the rest of the boat.
- Alternatively good quality car paints can do the same job.
A lick of paint or gelcoat can make all the difference to the appearance
Step 8: Polishing
Polishing is one of those really easy things to do, but if you want it to look perfect will take a long time.
Begin with 320 grit wet and dry paper and work up to 2000 grit. Finally finishing off the area with course and fine polish. By doing this carefully and methodically it will give you a professional finish.
Be careful not to work the area too much, you might go through the paint or gelcoat and then have to start the process again, which will only make you feel a little annoyed and not gain boat speed.